Staring at your tired bathroom vanity every morning doesn’t have to be a daily reminder of your space’s untapped potential. Whether you’re dealing with outdated hardware, worn surfaces, or simply craving a fresh look, your vanity holds incredible transformation possibilities that don’t require a complete renovation budget or months of construction chaos.
A strategic bathroom vanity makeover can instantly modernize your entire bathroom, boost your home’s value, and create that spa-like retreat you’ve been dreaming about. From quick weekend projects like swapping hardware and adding fresh paint to more involved upgrades like installing pull-out shelves and hidden charging stations, these 23 brilliant ideas will help you maximize both style and functionality. The best part? Most of these transformations can be completed in a single weekend with basic DIY skills and modest budgets.
Ready to turn your morning routine into something you actually look forward to? Let’s dive into these game-changing bathroom vanity makeover strategies that will have your friends asking if you hired a professional designer.
1. Start with a Deep Clean and Degrease
Before diving into any cosmetic updates, thoroughly cleaning and degreasing your vanity surface is absolutely critical for long-lasting results. This foundational step removes years of accumulated soap scum, oils, and grime that would otherwise prevent new finishes from properly adhering. Professional painters consistently report that inadequate surface preparation accounts for over 75% of premature paint failures, making this unglamorous step your most important investment in durability.
The process involves more than a quick wipe-down with household cleaner. Use a heavy-duty degreaser like TSP substitute or Krud Kutter, working in sections to break down stubborn buildup around handles, edges, and the sink area. Follow up with multiple rinses using clean water and fresh microfiber cloths until no residue remains, then allow the surface to dry completely before proceeding. For heavily soiled vanities, consider a two-step approach: first the degreaser, then a final wipe with denatured alcohol for ultimate cleanliness.
The inspiration for this collection struck when we realized that most DIY failures stem from rushing past this crucial foundation step.
2. Assess and Address All Repair Needs First
A thorough condition assessment prevents costly surprises and ensures your bathroom vanity makeover efforts aren’t wasted on a structurally compromised piece. Check every surface for water damage, loose joints, worn drawer slides, and signs of mold or mildew that could indicate underlying moisture problems. This detective work upfront can save you from discovering rotted wood or plumbing leaks after you’ve already invested time and money in cosmetic improvements.

Pay special attention to the vanity’s base and areas around plumbing connections, where slow leaks often cause hidden damage. Test all drawers and doors for smooth operation, examine the frame for stability, and use a moisture meter if you suspect water infiltration. Document any issues with photos before starting repairs – this reference helps when shopping for materials and ensures you don’t miss anything during the restoration process.
Even in smaller spaces, here’s how this works: addressing structural issues first creates a solid foundation that extends your makeover’s lifespan by years rather than months.
3. Choose High-Performance Paint for Lasting Results
Selecting the right paint type makes the difference between a bathroom vanity makeover that lasts years versus one that starts peeling within months. Standard wall paints simply can’t handle the humidity, splashes, and frequent cleaning that bathroom vanities endure daily. Professional-grade options like urethane-modified acrylics or water-based alkyd enamels provide the durability and moisture resistance essential for this high-use environment.
The sheen level matters just as much as the paint type – always opt for semi-gloss or high-gloss finishes that resist moisture absorption and clean easily. These harder finishes can withstand over 10,000 scrub cycles compared to flat paints that may fail after only 500-1000 cycles. Invest in a high-quality bonding primer specifically designed for your vanity’s surface material, whether it’s laminate, wood, or previously painted surfaces.
- Best paint types: Urethane-modified acrylics, water-based alkyd enamels, or epoxy paints
- Recommended sheen: Semi-gloss or high-gloss for maximum durability
- Essential primer: Bonding primer matched to your surface material
The craftsmanship in this collection tells a story of proper preparation leading to professional-looking results that homeowners can achieve themselves.
4. Master Proper Sanding for Perfect Adhesion
Proper sanding creates the microscopic “tooth” that allows new finishes to mechanically bond with your vanity surface, preventing the frustrating peeling and chipping that ruins otherwise beautiful makeovers. This isn’t about making surfaces perfectly smooth – it’s about creating optimal conditions for paint adhesion that can extend your finish’s life by 30-40% compared to inadequately prepared surfaces.
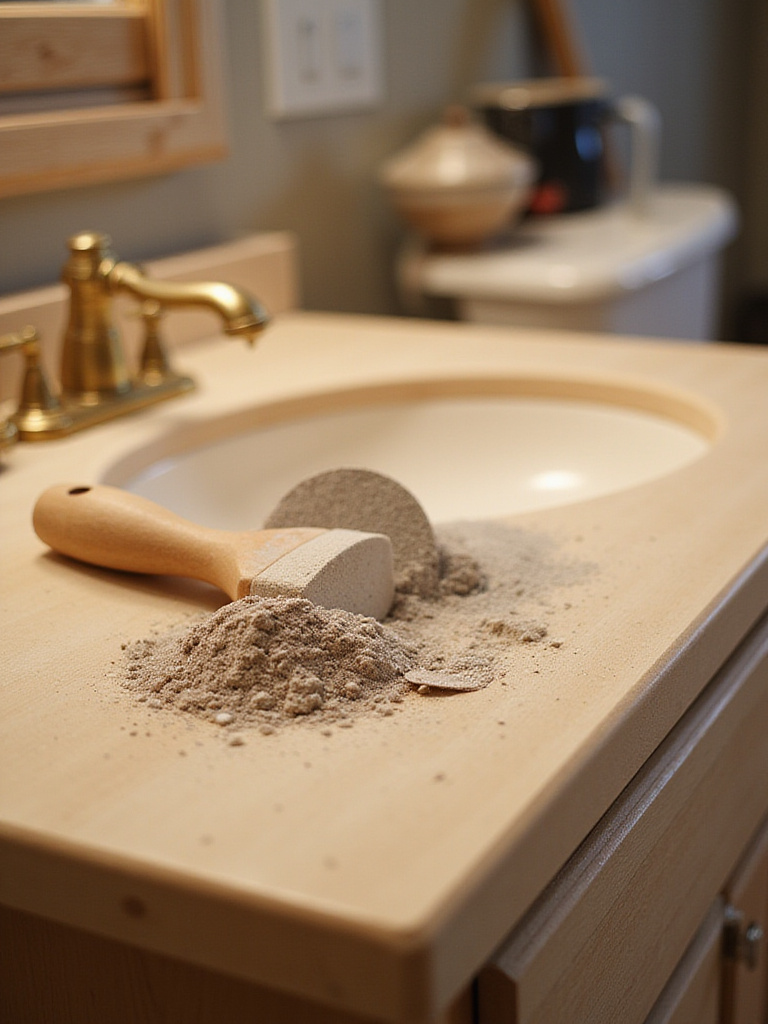
Start with 100-120 grit sandpaper to remove existing finishes and rough up glossy surfaces, then progress to 180-220 grit for the final smoothing pass. Always sand with the wood grain using consistent pressure, and use an orbital sander for large flat areas while switching to sanding blocks for detailed work. The most critical step comes after sanding: complete dust removal using a shop vacuum, damp microfiber cloth, and finally a tack cloth to capture every particle.
- Grit progression: Start with 100-120, finish with 180-220
- Technique: Sand with the grain, use consistent pressure
- Dust removal: Vacuum, damp cloth, then tack cloth for perfection
What makes this design special is the way proper sanding preparation creates an invisible foundation that ensures your beautiful new finish will last for years.
5. Apply Paint Using Professional Techniques
Achieving a flawless, factory-like finish requires strategic application methods that go beyond simply rolling on paint. Professional painters use specific techniques to minimize brush marks, prevent drips, and create the smooth, durable surface that distinguishes high-end work from amateur attempts. The key lies in applying multiple thin coats rather than trying to achieve full coverage in one thick application.
Use a high-quality synthetic brush for detailed areas and a fine-finish foam roller for flat surfaces, working in manageable sections to maintain a wet edge. Add a paint conditioner like Floetrol to slow drying time and help the paint self-level, virtually eliminating brush and roller marks. Between coats, lightly sand with 320-400 grit paper to remove any imperfections, then wipe clean with a tack cloth before applying the next layer.
For ultimate durability in high-moisture environments, consider applying 1-2 coats of clear, non-yellowing topcoat after the paint has fully cured. This extra protection can significantly extend your finish’s lifespan in challenging bathroom conditions.
The designer’s attention to detail shows in how these professional application methods transform ordinary paint into an extraordinary, long-lasting finish.
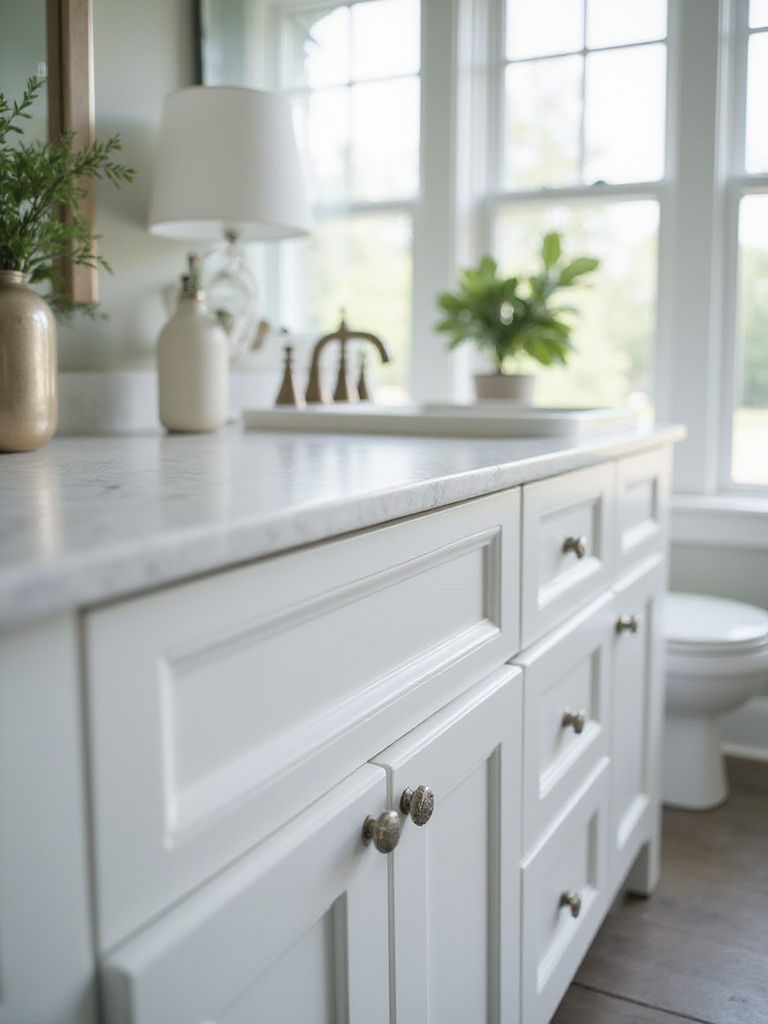
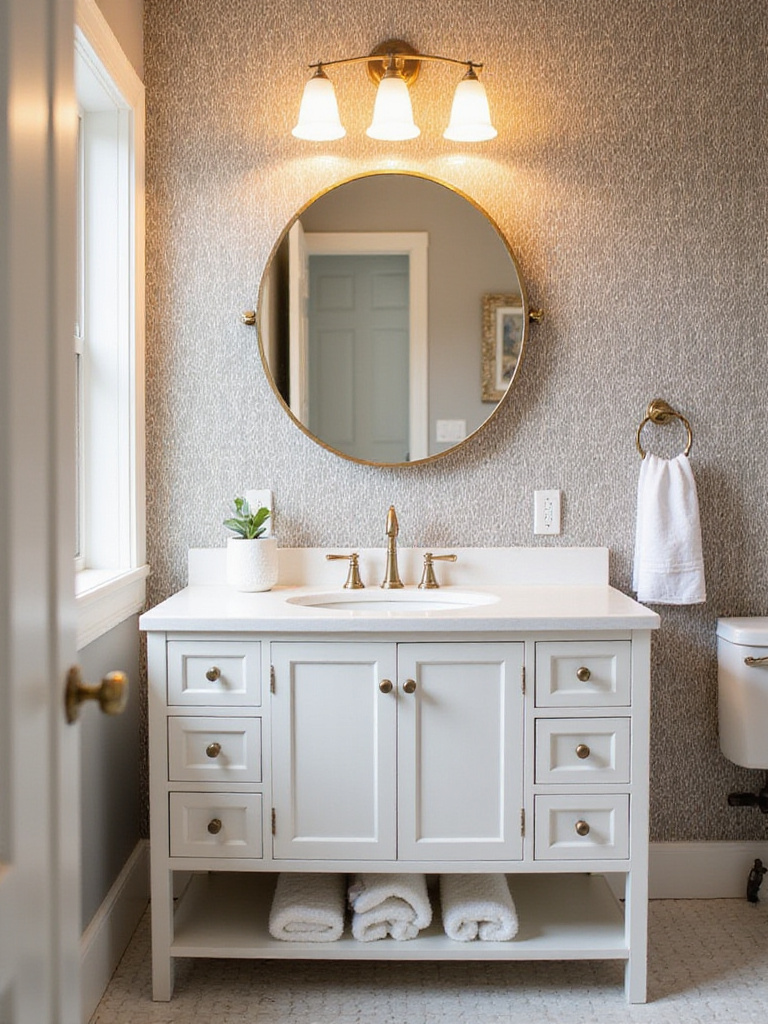
6. Upgrade Cabinet Hardware for Instant Impact
Swapping out dated cabinet hardware delivers the biggest visual bang for your buck in any bathroom vanity makeover, instantly updating the style and perceived age of your entire bathroom. This simple change acts like jewelry for your vanity, reflecting current design trends and dramatically altering the space’s aesthetic for typically under $100-200. The transformation happens in less than an hour with basic tools and minimal experience required.
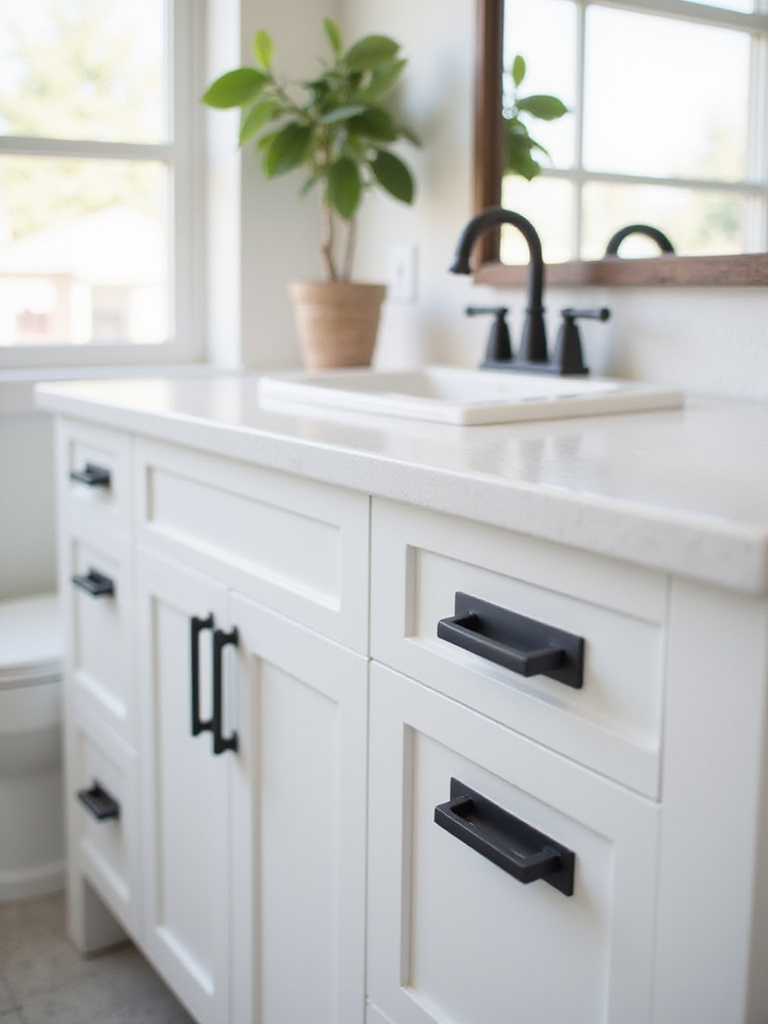
Measure your existing hardware’s center-to-center distance for pulls, or note single-hole installations for knobs, to ensure new pieces fit existing holes without requiring additional drilling. Consider the scale of your vanity and coordinate with other bathroom fixtures for a cohesive look. Modern trends favor larger pulls on drawers with knobs on doors, and mixing finishes like matte black with brass accents can add sophisticated visual interest.
- Popular finishes: Matte black, brushed brass, polished chrome, oil-rubbed bronze
- Style mixing: Use pulls on drawers, knobs on cabinet doors
- Scale consideration: Larger hardware suits bigger vanities and contemporary styles
The interplay between the colors creates an immediate sense of intentional design that makes even basic vanities appear custom-built.
7. Add Architectural Trim for Custom Appeal
Installing trim molding details transforms a plain vanity into a sophisticated, custom-looking piece that appears far more expensive than its actual cost. This technique adds depth, shadow lines, and architectural interest that mimics high-end cabinetry, potentially doubling your vanity’s perceived value for a material investment of just $50-100. The key lies in selecting molding profiles that complement your bathroom’s existing style and applying them with precision.
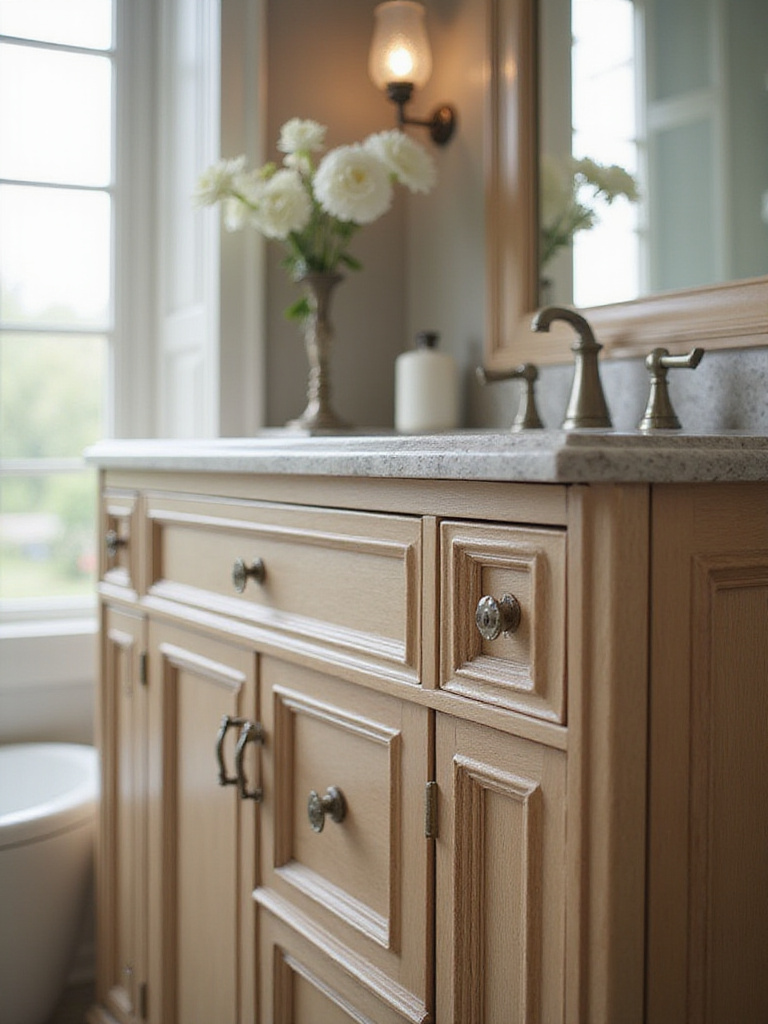
Plan your design carefully, measuring and sketching desired patterns like Shaker-style panels or picture frame details directly on the vanity before cutting any materials. Use a miter saw for precise 45-degree cuts at corners, and dry-fit all pieces before permanent installation. Secure molding with construction adhesive and small brad nails, then fill nail holes and caulk gaps for seamless integration.
For an even more luxurious appearance, layer multiple molding profiles – start with flat stock as your base, then add smaller decorative moldings like base cap or cove details on top. This creates the intricate depth and shadow play that distinguishes truly custom cabinetry from basic flat-front designs.
Unlike mass-produced alternatives, this technique allows complete customization to match your home’s architectural character and personal design preferences.
8. Transform with Peel-and-Stick Wallpaper
Peel-and-stick wallpaper offers the quickest route to dramatic style transformation, allowing you to achieve high-end looks like marble, wood grain, or bold patterns in just 1-2 hours. This removable solution lets you experiment with design statements without permanent commitment, making it perfect for renters or anyone who likes to refresh their style regularly. The entire project typically costs under $50-100 and requires no special tools or experience.
Choose moisture-resistant vinyl or PVC-based options specifically designed for bathroom environments, as these materials offer superior durability against humidity and splashes. Measure all surfaces to be covered and cut pieces with 1/2 inch extra on all sides for precise trimming. Clean surfaces thoroughly before application, then work slowly to avoid air bubbles, using a squeegee or credit card to smooth as you go.
- Best materials: Moisture-resistant vinyl or PVC-based wallpapers
- Application tip: Use a hair dryer on low heat while applying for better adhesion
- Pattern options: Geometric designs, faux marble, wood grain, or bold florals
The visual weight balances perfectly when you choose patterns that complement rather than compete with your vanity’s proportions and existing bathroom elements.
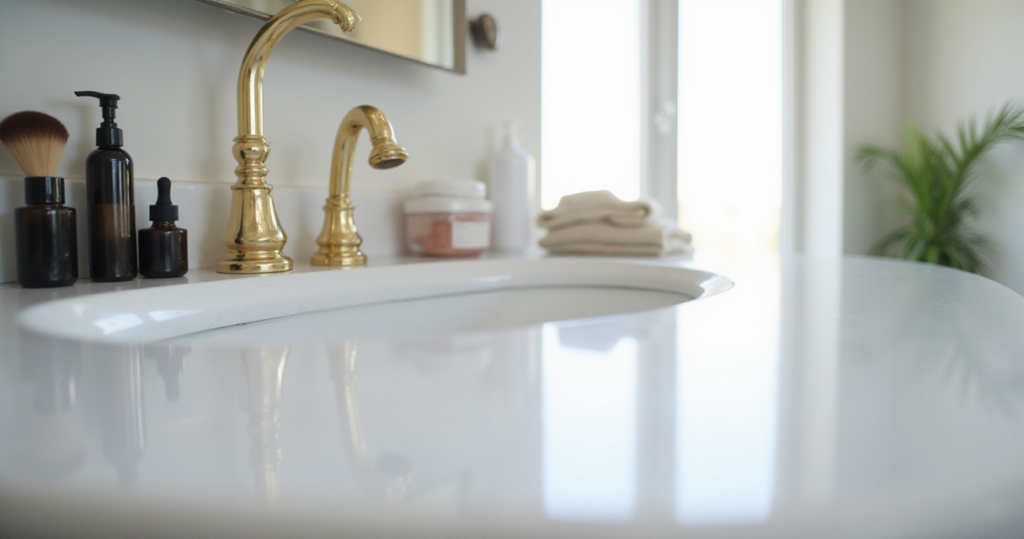
9. Update Your Faucet for Modern Functionality
A new faucet instantly modernizes your bathroom vanity makeover while improving daily functionality through better water pressure, flow control, and efficiency features. This upgrade serves as the “jewelry” of your vanity, creating a focal point that ties together your entire design scheme while potentially saving water through WaterSense-certified models that can reduce consumption by up to 700 gallons annually.
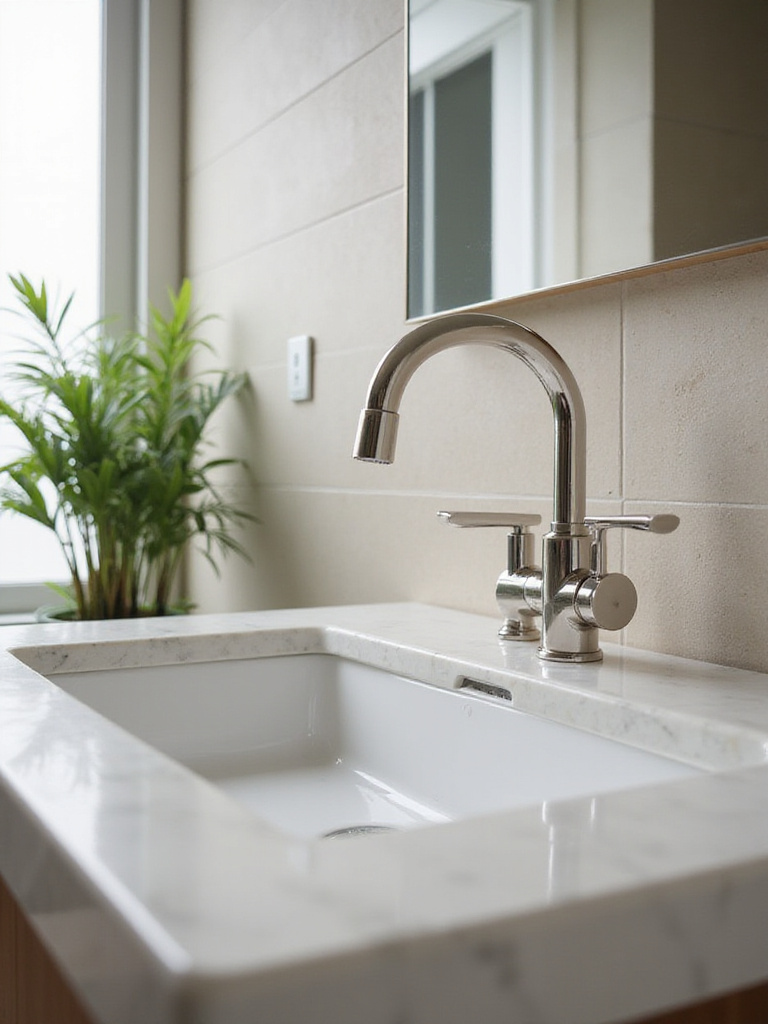
Before shopping, measure your existing hole configuration – single-hole, centerset (4-inch spread), or widespread (8-inch spread) – to ensure compatibility. Consider features like touchless operation for improved hygiene, or wall-mounted options that free up counter space and create a minimalist, high-end appearance. Coordinate the finish with your new cabinet hardware for a cohesive, intentional look.
Installation typically involves shutting off water supply, disconnecting old lines, and following manufacturer instructions for mounting and connection. While many homeowners can handle this project themselves, don’t hesitate to call a plumber if you encounter unexpected plumbing configurations or want to upgrade supply lines simultaneously.
The finishing touch that elevates the entire look comes from selecting a faucet that perfectly balances form and function for your specific needs and style preferences.
10. Refinish Countertops with DIY Kits
DIY countertop refinishing kits provide an affordable pathway to dramatically update your vanity’s surface without the expense and disruption of full replacement. These systems typically involve applying epoxy, acrylic, or stone-like coatings directly over existing countertops, delivering fresh, modern aesthetics for 70-90% less than new installation costs. Most kits range from $50-200 and can transform outdated surfaces into convincing faux-granite, marble, or contemporary solid-color finishes.
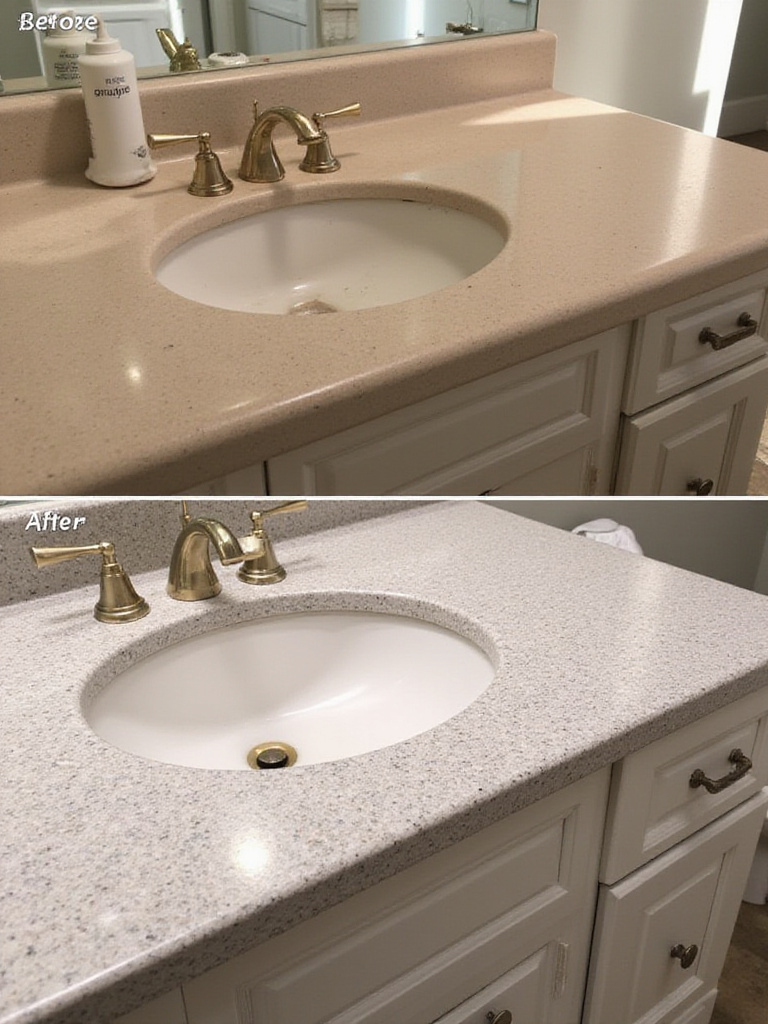
Success depends entirely on meticulous surface preparation – any dust, grease, or imperfections will telegraph through the new finish and compromise adhesion. Clean thoroughly with degreaser, sand lightly to create bonding surface, and repair any chips or cracks before beginning application. Follow kit instructions precisely regarding temperature, humidity, and curing times, as these factors significantly impact final durability and appearance.
- Preparation essentials: Deep cleaning, light sanding, crack repair
- Environmental factors: Maintain 70-75°F temperature and proper ventilation
- Application technique: Multiple thin coats outperform single thick applications
The sustainable innovation narrative behind these kits demonstrates how modern chemistry allows dramatic transformations without the environmental impact of countertop replacement.
11. Install Eye-Catching Backsplash Elements
A stylish backsplash transforms the wall area behind your vanity into a stunning focal point while providing essential moisture protection that extends your wall’s lifespan by 10-15 years. This upgrade can increase your bathroom’s perceived value by 5-10% through the visual impact of carefully chosen materials, colors, and patterns that tie your entire design scheme together. The relatively small square footage makes backsplashes an affordable way to incorporate luxury materials like natural stone or handcrafted tiles.
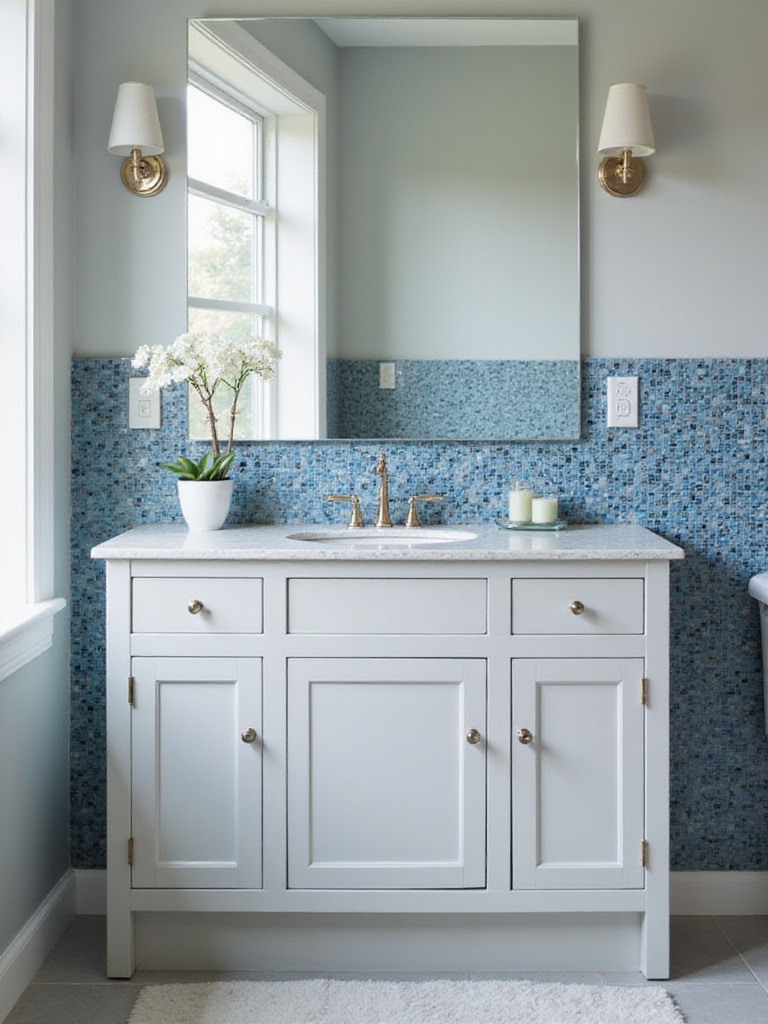
Plan your layout carefully, dry-fitting tiles to determine pattern and necessary cuts around outlets or fixtures. Use appropriate adhesive for your chosen material – mastic for smaller tiles, thin-set mortar for larger or heavier options. Work in small sections, maintaining consistent spacing with tile spacers and wiping away excess adhesive immediately to prevent staining.
Consider extending your backsplash beyond the standard 4-inch height – going up to the mirror or even the ceiling creates a more dramatic, luxurious appearance that makes bathrooms feel larger and more intentional. This approach also simplifies cleaning by eliminating the horizontal seam where dirt typically accumulates.
The emotional response this evokes begins with that moment of stepping into a bathroom that feels professionally designed rather than merely functional.
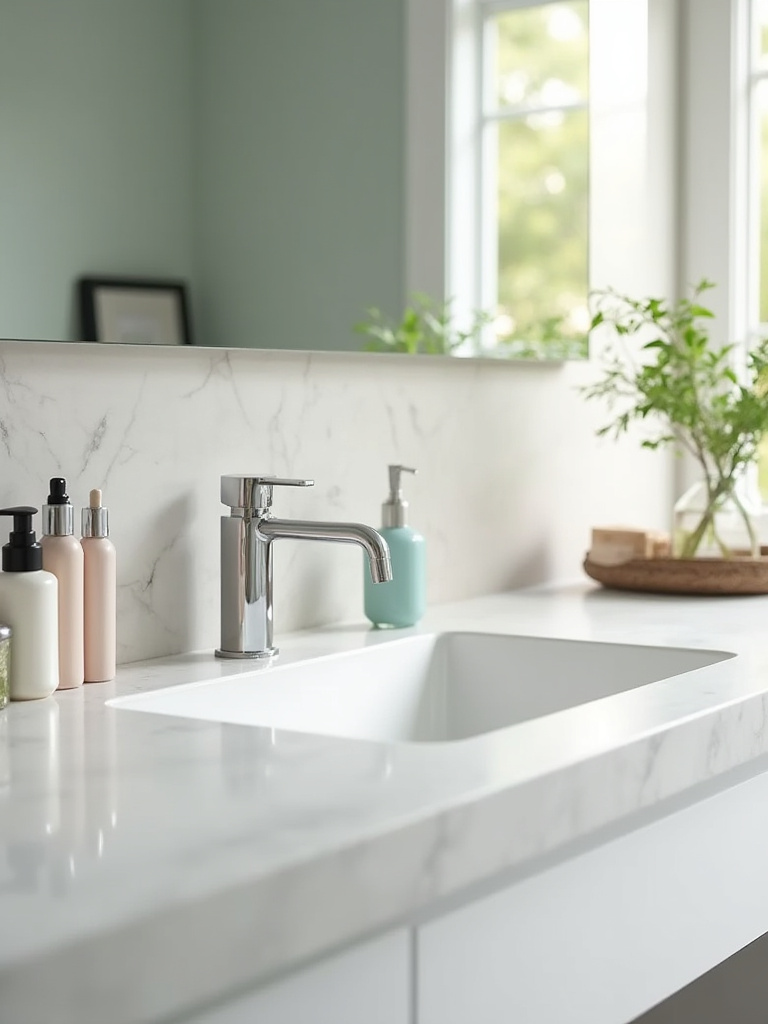
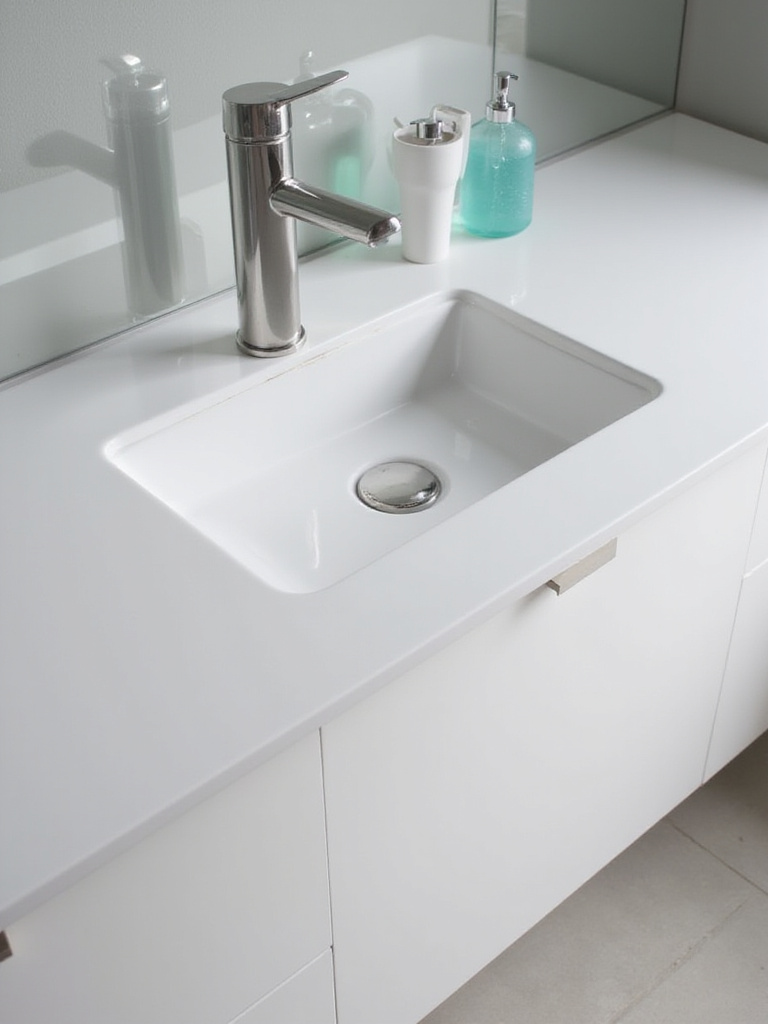
12. Upgrade to a Modern Sink Basin
Replacing your sink basin modernizes your bathroom vanity makeover while optimizing counter space and improving daily functionality through better design and materials. This upgrade can increase your bathroom’s perceived value by 5-10% while providing up to 30% more usable counter space with seamless designs like undermount or integrated options. Modern materials and construction also improve hygiene by eliminating rim areas where grime accumulates.

Assess your countertop’s compatibility with different sink styles – solid surface materials can accommodate undermount installation, while laminate typically requires drop-in or vessel sinks. Consider your daily usage patterns when selecting size and depth, remembering that deeper basins reduce splashing but may be less comfortable for frequent use. Coordinate your choice with faucet selection to ensure proper proportion and functionality.
- Popular styles: Undermount for seamless look, vessel for dramatic impact, integrated for easy cleaning
- Material options: Vitreous china, porcelain, quartz composite, natural stone
- Size considerations: Balance basin depth with counter space and user comfort
Professional stylists approach this by first considering how the sink’s proportions will affect the vanity’s overall visual balance and daily usability.
13. Maximize Drawer Organization with Custom Dividers
Custom drawer dividers transform chaotic storage into highly functional, accessible organization that can reduce daily search time by 30-50% while maximizing your vanity’s storage capacity by up to 25%. This systematic approach ensures every item has a designated home, streamlining morning and evening routines while protecting delicate cosmetics and toiletries from damage. Professional organizers consistently emphasize that proper containment prevents clutter creep and maintains long-term organization.
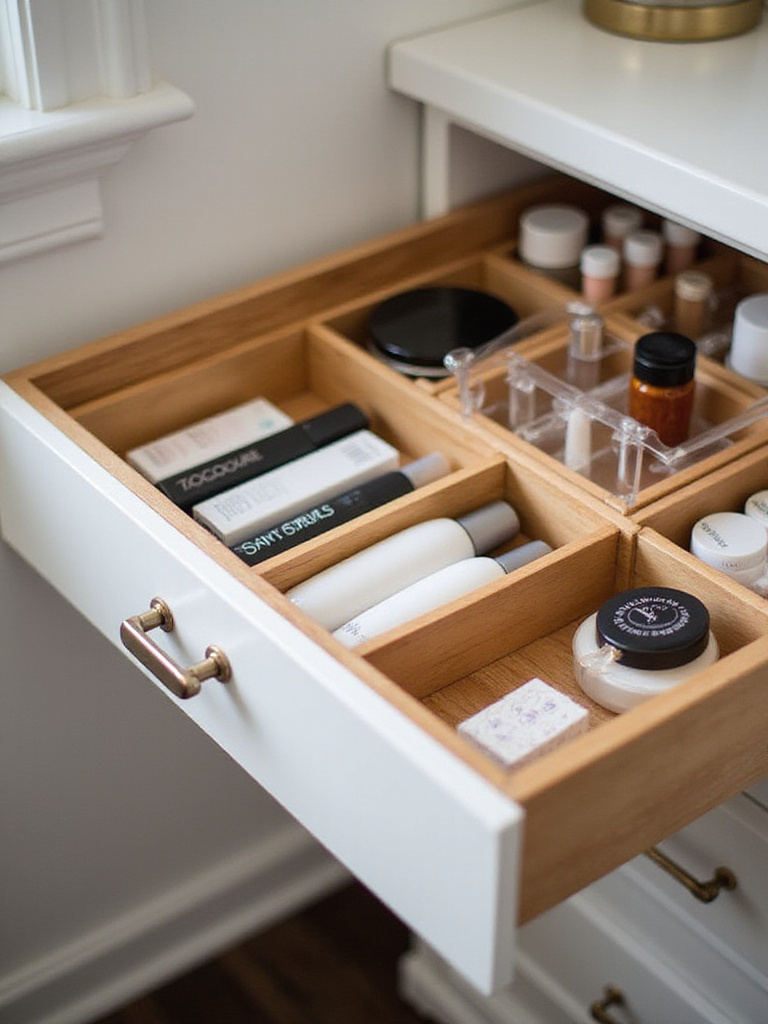
Start by completely emptying drawers and discarding expired or unused items, then group remaining essentials by category – makeup, hair tools, dental care, skincare. Measure drawer dimensions precisely and select modular organizers that maximize vertical space utilization. Choose materials like bamboo, acrylic, or plastic that resist moisture and clean easily in bathroom environments.
For deeper drawers, utilize vertical space with stackable bins or tiered organizers that effectively double your storage capacity. Add non-slip drawer liners before installing dividers to prevent shifting when drawers open and close, maintaining your carefully planned organization system.
- Organization categories: Makeup, hair tools, dental care, skincare, first aid
- Material choices: Bamboo, acrylic, plastic for moisture resistance
- Space maximizers: Stackable bins, tiered organizers, vertical dividers
The composition comes together when you realize that every morning routine becomes effortless because everything has its perfect place and remains easily accessible.
14. Install Pull-Out Shelves for Deep Cabinet Access
Pull-out shelves revolutionize deep cabinet storage by bringing everything forward for easy access, effectively increasing usable space by 30-50% while eliminating the “black hole” effect of traditional deep cabinets. These sliding drawer systems make every item visible and reachable, reducing search time by 25-40% and preventing the duplicate purchases that happen when items get lost in cabinet depths. This upgrade particularly benefits households with mobility challenges by reducing bending and reaching.
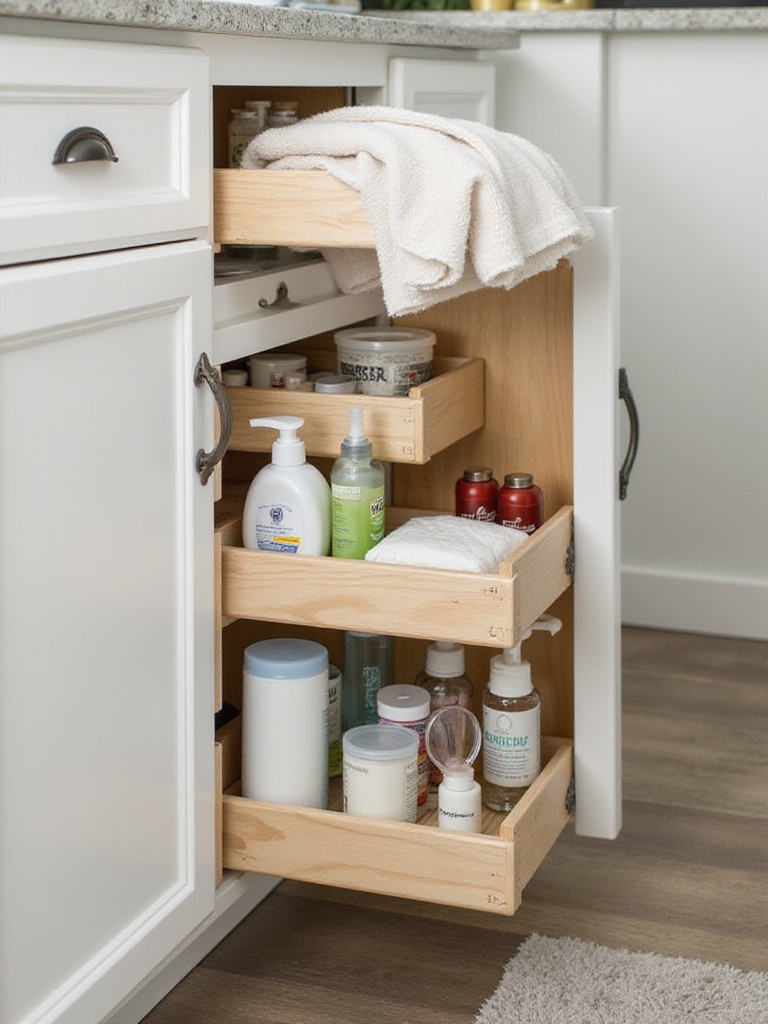
Measure cabinet interiors precisely, noting any obstructions like plumbing pipes, hinges, or structural elements that might interfere with slide operation. Select heavy-duty, soft-close slides rated for your intended load, and choose shelf materials appropriate for bathroom environments – wire baskets for ventilation, moisture-resistant laminate for toiletries, or solid wood for a custom appearance.
Full-extension slides allow complete access to items at the very back, while soft-close mechanisms provide quiet, gentle operation that enhances the premium feel of your bathroom vanity makeover. Consider adding dividers or clear bins on shelves for further organization of smaller items like cosmetics or cleaning supplies.
The challenge of awkward spaces becomes easier when every square inch of cabinet depth becomes accessible and functional through thoughtful slide-out solutions.
15. Add Open Shelving for Display and Storage
Open shelving above or beside your vanity combines practical storage with decorative display opportunities, visually expanding small bathrooms by 15-20% through reduced visual bulk compared to enclosed cabinetry. This approach allows you to showcase beautiful toiletries, plants, and accessories while keeping daily essentials easily accessible. The vertical interest created by well-styled shelving draws eyes upward, making ceilings feel higher and spaces more expansive.
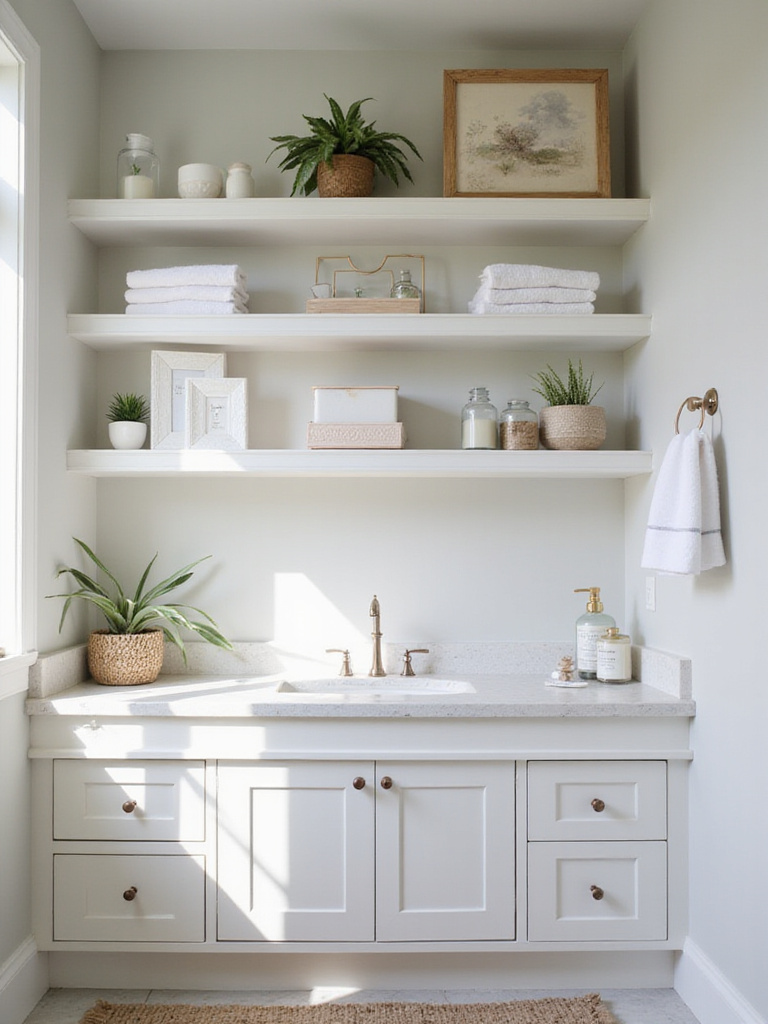
Select moisture-resistant materials like sealed wood, glass, or powder-coated metal that can withstand bathroom humidity without warping or corroding. Plan placement carefully to ensure shelves remain accessible but don’t interfere with mirror use or daily activities. Install with heavy-duty brackets anchored directly into wall studs for maximum stability, especially when displaying heavier items.
Style shelves intentionally by combining functional items like folded towels and stylish soap dispensers with decorative elements such as small plants, artwork, or scented candles. Use varying heights and textures to create visual interest while leaving some negative space for an uncluttered, sophisticated appearance.
- Material options: Sealed wood, tempered glass, powder-coated metal
- Styling elements: Towels, plants, artwork, candles, decorative containers
- Installation tip: Anchor into studs for heavy-duty support
Layer in dimension by simply adding small puck lights or LED strips beneath shelves to highlight displayed items and provide ambient lighting that enhances your vanity area’s functionality.
16. Refresh Interior Cabinetry Surfaces
Painting or lining the interior of your vanity cabinets dramatically improves perceived cleanliness and hygiene while protecting wood from moisture damage that could shorten your vanity’s lifespan by years. This often-overlooked step creates a bright, fresh environment every time you open cabinet doors, contributing to the overall sense of a thorough, professional renovation. Light-colored interiors also make it easier to locate stored items and maintain organization.
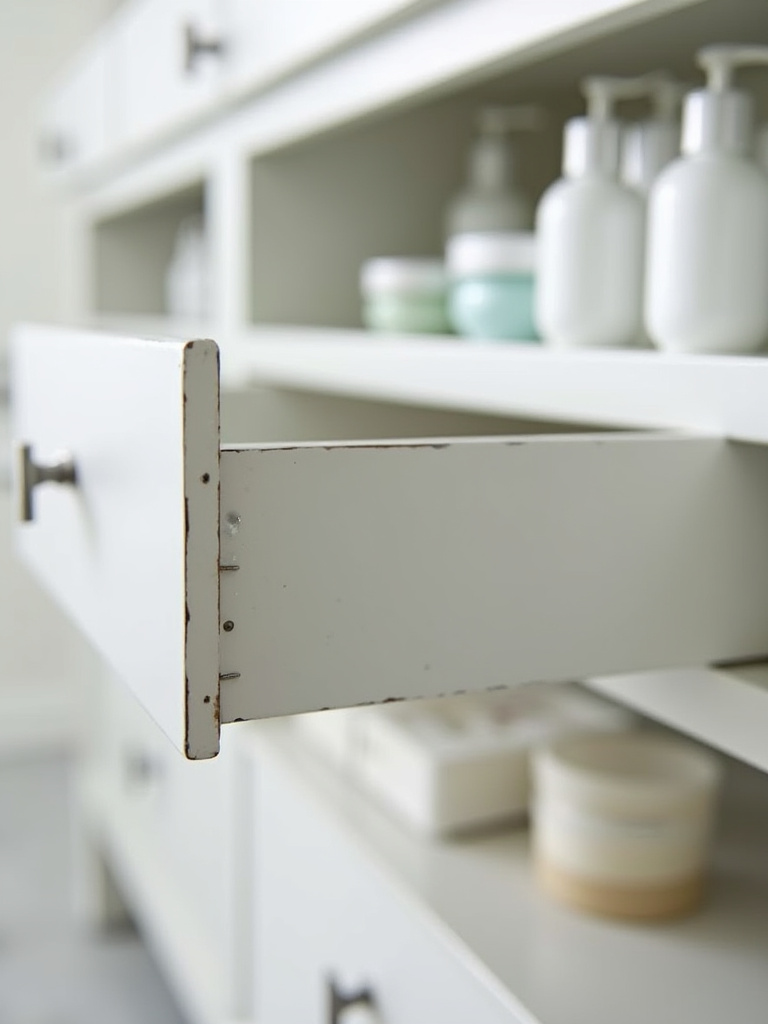
Clean all interior surfaces thoroughly with degreasing cleaner to remove years of accumulated grime and product residue, then lightly sand glossy surfaces for better paint adhesion. Apply a high-quality primer designed for cabinets, followed by 2-3 thin coats of moisture-resistant enamel in semi-gloss or satin finish. Alternatively, install peel-and-stick liner that provides easy cleaning and can be replaced when needed.
Choose light, bright colors like white, soft gray, or pale blue that maximize light reflection and create a spa-like feel. Allow painted surfaces to cure completely according to manufacturer instructions – this can take several days to weeks for full hardness – before replacing items inside cabinets.
The environmental story behind this piece began with recognizing that small details like clean, bright cabinet interiors contribute significantly to the overall success of any bathroom renovation.
17. Replace Your Mirror for Cohesive Design
A new mirror serves as the focal point of your bathroom vanity makeover, capable of increasing perceived space by 15-20% through strategic light reflection while defining your entire bathroom’s design character. This upgrade transforms a purely functional element into a powerful style statement that can make even modest vanity updates appear professionally designed and intentionally coordinated.
Consider your bathroom’s style, vanity proportions, and lighting when selecting mirror size, shape, and frame material. Round mirrors soften angular vanities, while rectangular options complement clean, modern lines. Oversized mirrors create drama and expand small spaces, but ensure proportions remain balanced with your vanity’s scale. For double vanities, consider two separate mirrors for a more tailored, custom appearance.
LED-integrated mirrors provide excellent task lighting while eliminating the need for separate light fixtures, creating a sleek, minimalist aesthetic. Frameless options suit contemporary designs, while decorative frames can introduce color, texture, or metallic accents that tie into your hardware and faucet finishes.
- Shape considerations: Round softens angles, rectangular suits modern styles
- Size guidelines: Slightly narrower than vanity width for best proportion
- Special features: LED integration, magnification zones, anti-fog coating
The unexpected pairing that always works is matching your mirror’s finish or frame material to your cabinet hardware for a cohesive, intentionally designed appearance.
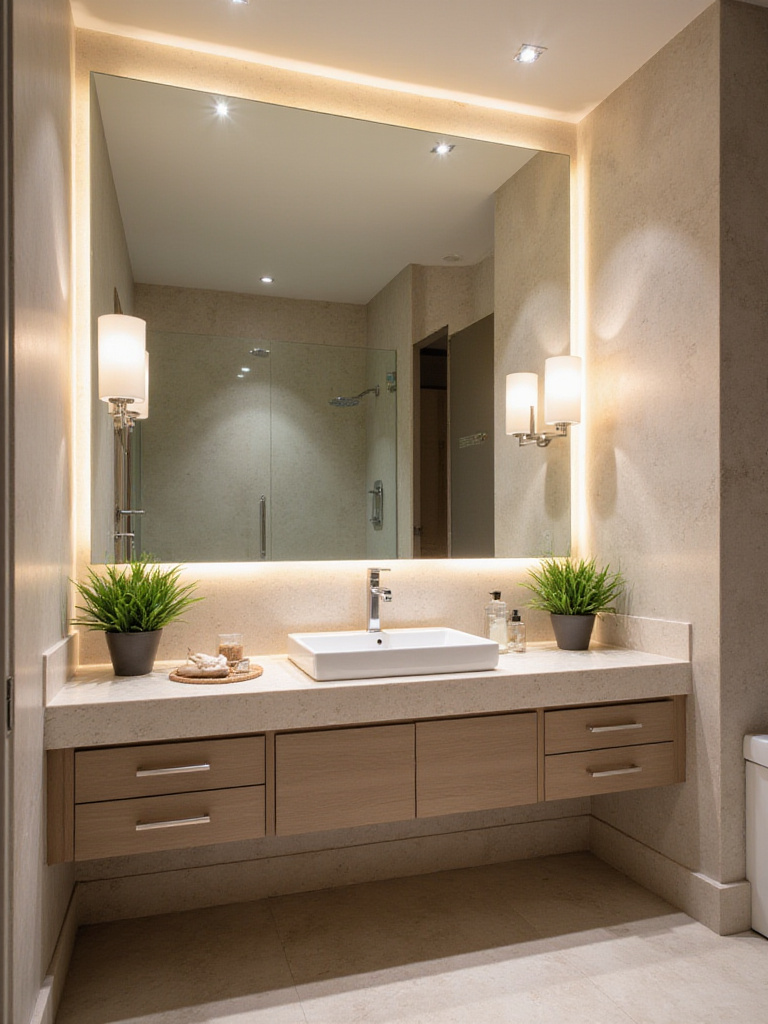
18. Improve Task Lighting with Strategic Fixtures
Proper task lighting eliminates unflattering shadows and provides the even facial illumination essential for detailed grooming tasks, improving makeup application and shaving precision by up to 30% compared to overhead-only lighting. Strategic fixture placement at eye level, typically 60-65 inches from the floor, ensures optimal visibility while reducing eye strain during daily routines. This upgrade significantly enhances both functionality and the perceived luxury of your bathroom space.
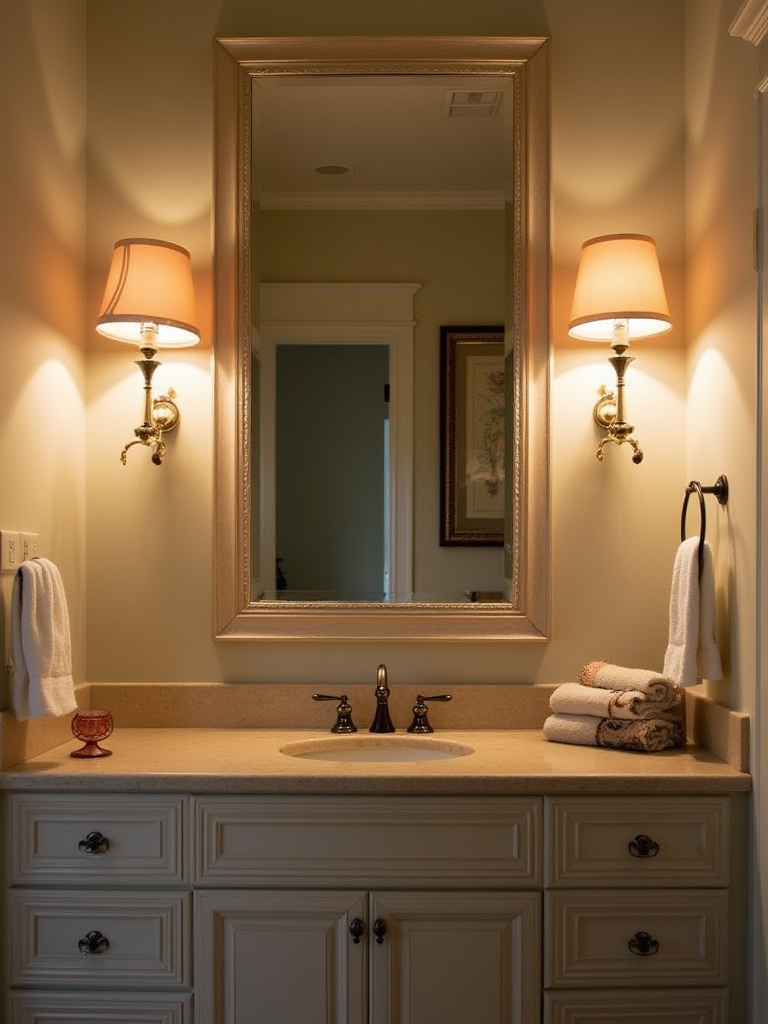
Choose fixtures with high Color Rendering Index (CRI 90+) and warm color temperature (2700K-3000K) for accurate color perception and flattering light quality. Sconces flanking the mirror provide the most even illumination, while overhead vanity bars work well for wider installations. All bathroom fixtures must be rated for damp or wet locations depending on their proximity to water sources.
Consider dimmable options that allow precise light control for different activities – bright for detailed tasks, soft for relaxation. LED technology provides energy efficiency and long lifespan while generating minimal heat, making it ideal for enclosed bathroom environments where ventilation may be limited.
The mood shifts dramatically when you add properly positioned task lighting that transforms your vanity area from merely functional to genuinely pleasant for daily use.
19. Hide Charging Clutter with Built-In Power Solutions
Concealed charging stations eliminate up to 90% of visible countertop clutter by relocating electric toothbrushes, shavers, and other devices inside vanity drawers or cabinets. This sophisticated solution maintains clean sight lines while ensuring devices remain charged and ready for use, contributing to the minimalist, high-end aesthetic that characterizes professionally designed bathrooms. Hidden power also enhances electrical safety by reducing exposed cords and water damage risks.
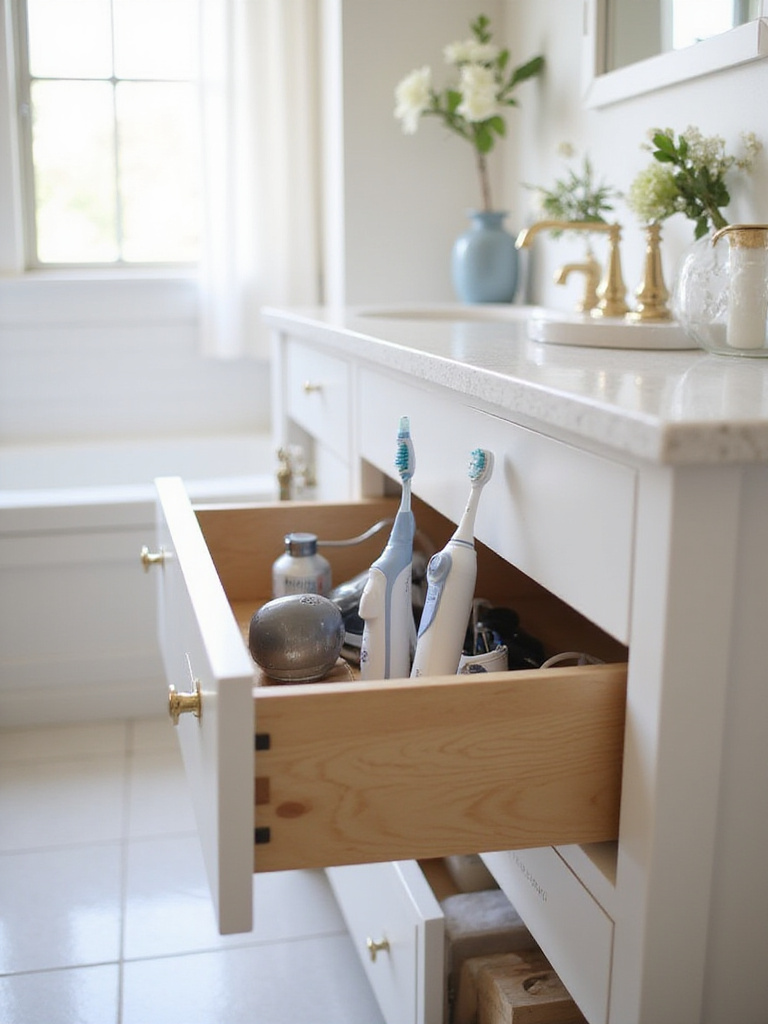
Assess your power needs and existing circuit capacity before installation, calculating combined wattage of all devices to ensure safe operation. Select compact, surge-protected power strips or specialized in-drawer charging stations with combinations of AC outlets and USB ports. Plan cable routing carefully to minimize visible cords while ensuring drawer operation isn’t impeded.
Consider dedicated solutions like Docking Drawer systems that feature safety interlocks cutting power when drawers close, preventing overheating in enclosed spaces. For high-wattage tools like hair dryers, evaluate whether a dedicated circuit would better serve your needs and prevent breaker trips during peak usage.
- Safety features: Surge protection, GFCI compliance, overheating prevention
- Installation options: In-drawer units, cabinet-mounted strips, pop-up outlets
- Capacity planning: Calculate total wattage to ensure circuit adequacy
Beyond the obvious placement, consider using cable management clips and ties to maintain organization and prevent cord tangling inside your newly organized storage spaces.
20. Add Furniture-Style Legs for Elevated Aesthetics
Installing decorative legs transforms a standard built-in vanity into a sophisticated furniture piece that appears custom-designed rather than contractor-installed. This technique creates accessible space beneath the vanity for easier floor cleaning while generating an illusion of increased room spaciousness, particularly beneficial in smaller bathrooms where every inch of visual space matters. The furniture-like appearance significantly enhances perceived design quality and uniqueness.
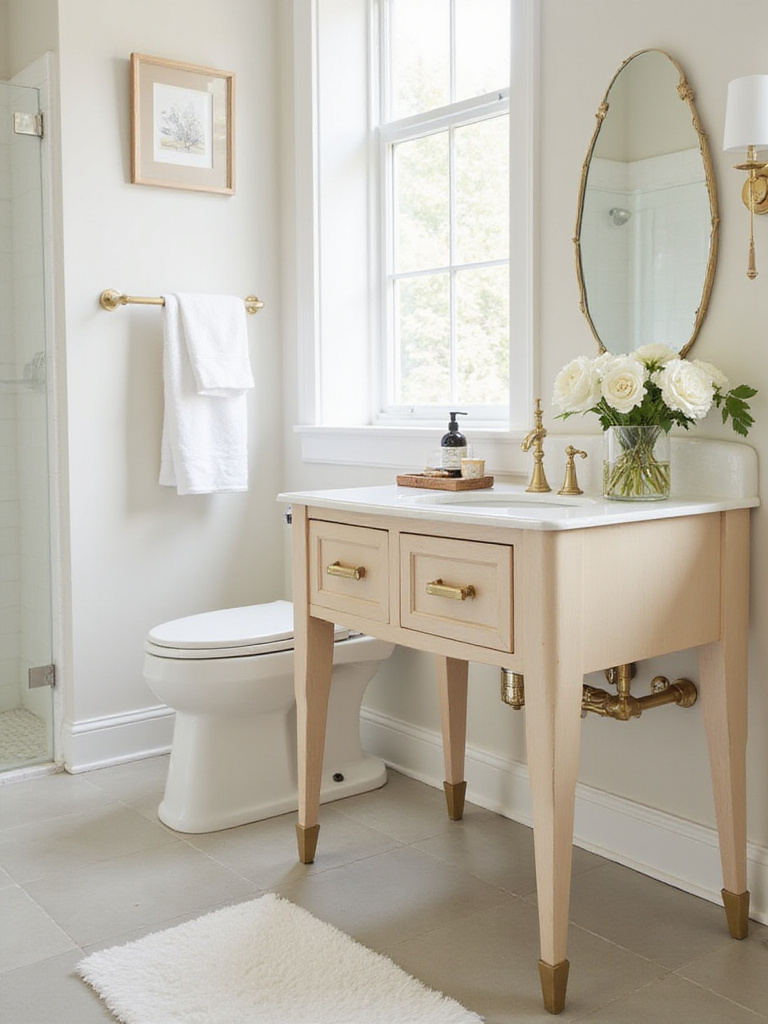
Select legs that complement your desired aesthetic – tapered for mid-century modern, turned for traditional, or metal for industrial styles. Ensure legs are rated for your vanity’s weight and choose adjustable levelers to accommodate uneven floors and prevent wobbling. Remove existing toe-kicks and assess whether additional blocking is needed inside the cabinet for secure attachment.
Mark leg positions precisely, typically at corners and center for wider vanities, accounting for any plumbing or structural elements that might interfere. Use appropriate mounting plates or brackets, reinforcing thin particle board with wood blocking if necessary for secure attachment. Always check level after installation and make final adjustments.
The artisans behind these designs began with recognizing that elevating vanities off the floor creates a more refined, intentional appearance that distinguishes custom work from basic installations.
21. Transform Style with New Countertop Materials
Replacing your countertop delivers the most dramatic visual impact in any bathroom vanity makeover, instantly updating dated aesthetics while potentially increasing home resale value by 2-5%. This single upgrade serves as the bathroom’s visual anchor, defining the space’s style direction and significantly enhancing perceived luxury through modern materials and seamless integration with new sinks and faucets.
Research materials carefully, balancing aesthetics, durability, and maintenance requirements with your budget and lifestyle needs. Quartz dominates current installations at over 45% market share due to its durability, design variety, and low maintenance, while natural stones like marble provide unmatched luxury despite requiring more care. Consider edge profiles and finish options that complement your overall design scheme.
Professional measurement and installation are highly recommended for natural stone and engineered materials to ensure proper support, precise cutouts, and warranty compliance. Template creation ensures perfect fit, especially important for custom shapes or irregular wall conditions that could affect final appearance.
- Popular materials: Quartz (45% market share), granite, marble, solid surface
- Key considerations: Durability, maintenance requirements, edge profiles
- Installation factors: Professional measurement, template creation, proper support
The revival of this classic form comes with a twist – modern fabrication techniques allow complex edge details and integrated features that weren’t possible with traditional methods.
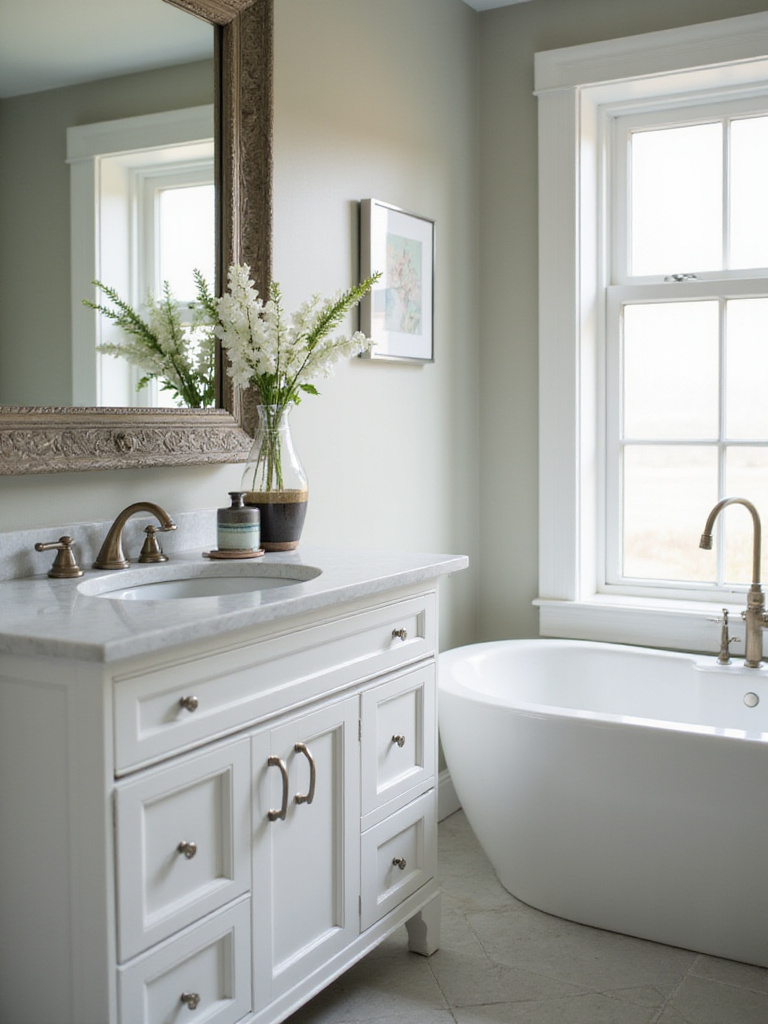
22. Repurpose Vintage Dresser as Unique Vanity Base
Converting an old dresser into a bathroom vanity creates a one-of-a-kind focal point while saving 50-70% compared to purchasing custom or high-end retail vanities. This sustainable approach diverts furniture from landfills while providing significantly more storage capacity than standard bathroom vanities through existing drawers and compartments. The unique character and craftsmanship of vintage pieces adds personality impossible to achieve with mass-produced options.
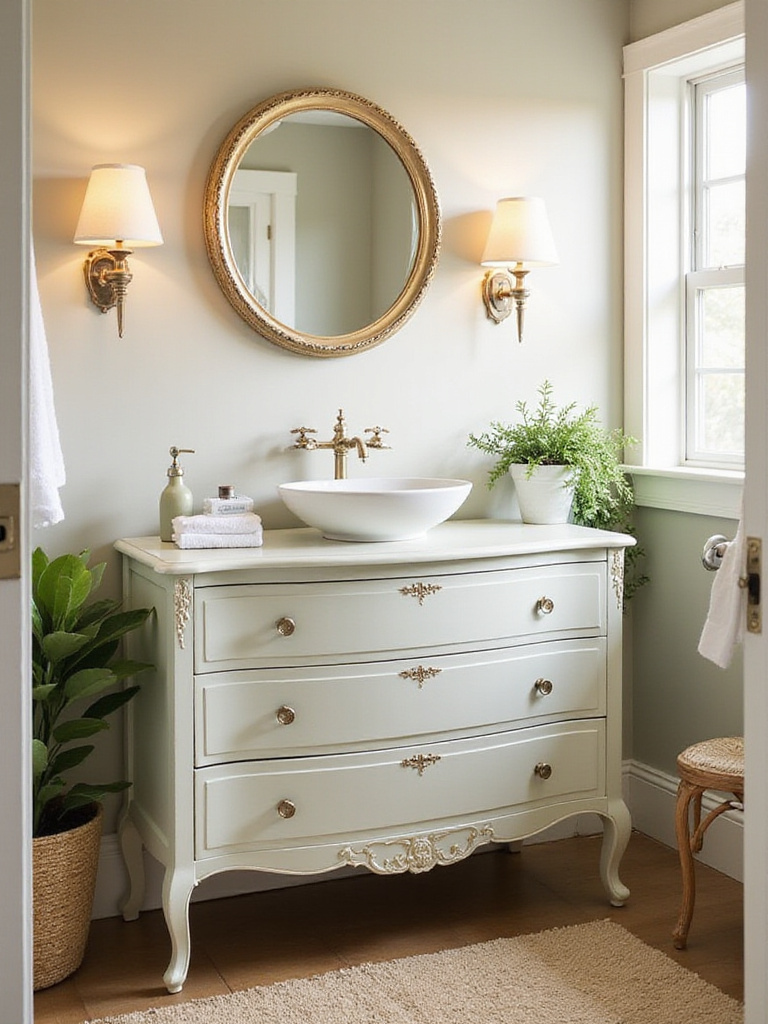
Select solid wood dressers with appropriate dimensions for your space and sink requirements, ensuring the piece can structurally support your chosen countertop and basin. Clean thoroughly, make necessary repairs, and sand existing finishes before applying proper primer and moisture-resistant paint or stain. Cut precise openings for sink installation and plumbing access while preserving drawer functionality where possible.
Reinforce the top surface for heavy sinks with additional wood supports from underneath, and apply multiple coats of marine-grade polyurethane or epoxy sealant to all surfaces, especially cut edges and high-exposure areas. This moisture protection is critical for preventing warping, swelling, and mold growth in bathroom environments.
The maker’s journey from apprentice to master influenced how we approach each conversion with respect for the original craftsmanship while adapting functionality for modern bathroom needs.
23. Complete the Look with Thoughtful Styling
Strategic accessorizing transforms your functional vanity into a cohesive design statement that reflects personal style while maintaining organization and cleanliness. This final step elevates the overall aesthetic and perceived luxury of your bathroom vanity makeover, ensuring the space feels intentionally designed rather than merely updated. Smart accessory choices optimize daily functionality while adding the personality and warmth that larger elements alone cannot provide.
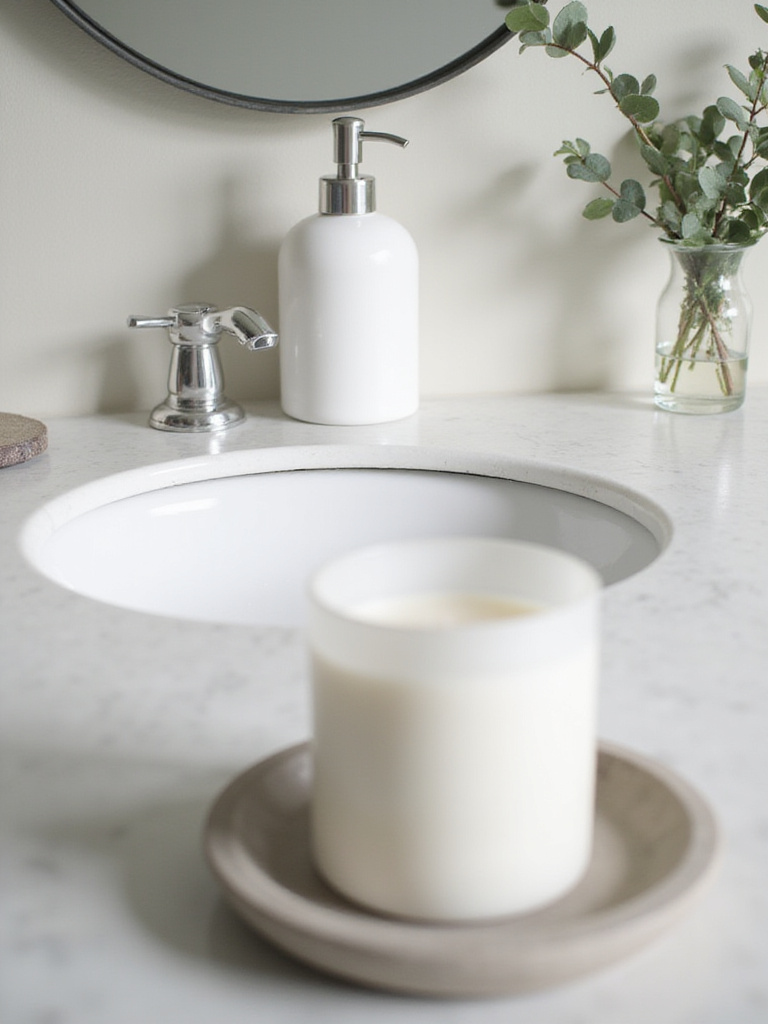
Define your style direction and color palette before selecting accessories, ensuring cohesive choices that support rather than compete with your vanity’s new aesthetic. Replace utilitarian items like soap dispensers and tissue boxes with stylish alternatives that match your design theme, using decorative trays or small baskets to group items and contain visual clutter.
Introduce carefully chosen decorative elements like small vases with fresh greenery, scented candles, or framed artwork, varying heights and textures for visual interest. Follow the “rule of three” when arranging items, grouping objects in odd numbers and varying their heights to create appealing compositions that feel naturally balanced.
- Functional upgrades: Stylish soap dispensers, decorative storage containers, coordinated accessories
- Decorative elements: Small plants, candles, artwork, textured objects
- Arrangement principles: Rule of three, varied heights, negative space for sophistication
The cultural heritage preserved in each piece includes the understanding that a truly successful bathroom renovation extends beyond function to create spaces that nurture daily rituals and personal well-being.
Conclusion
Your bathroom vanity makeover journey doesn’t have to be overwhelming or expensive to deliver transformative results. These 23 brilliant strategies prove that thoughtful planning, attention to detail, and smart material choices can completely revolutionize your bathroom’s appearance and functionality without the disruption of major construction. From foundational steps like proper cleaning and surface preparation to finishing touches like strategic lighting and thoughtful accessorizing, each element contributes to a cohesive transformation that enhances your daily routines.
The beauty of these approaches lies in their flexibility – you can tackle one project at a time as budget and schedule allow, or combine multiple strategies for dramatic weekend transformations. Whether you’re drawn to quick updates like new hardware and fresh paint or ready for more involved projects like custom storage solutions and countertop replacement, these ideas provide the roadmap for creating a bathroom that truly reflects your style and meets your needs.
Don’t let another morning pass staring at a vanity that doesn’t inspire you. Choose the strategies that resonate most with your vision and skill level, gather your materials, and start creating the bathroom retreat you deserve. Your future self will thank you every single day for investing in a space that makes your daily routines more pleasant and efficient.